How to Use Disposable Cameras at a Wedding
December 22, 2023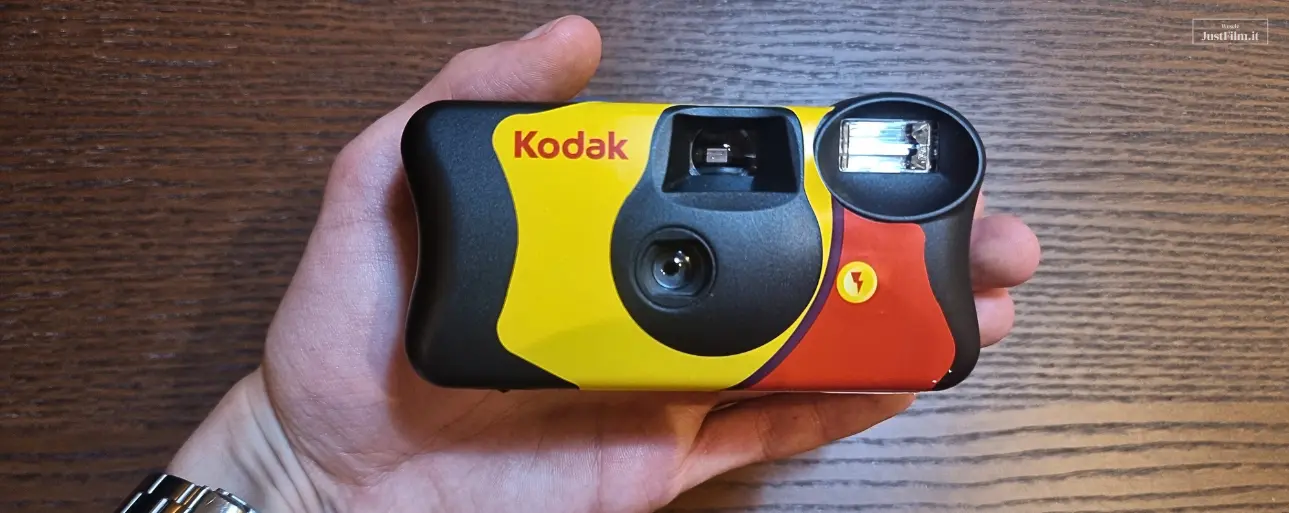
Disposable camera user guide
In our earlier article, “How to use disposable cameras at a wedding”, we introduced the idea of setting out disposable cameras as a fun extra activity for your guests. This time, we want to focus on a short, practical guide to actually using them - we’ll clear up the common sticking points and walk you step by step through taking great photos with these little cameras. We’ll demonstrate everything using the camera we personally use, the KODAK Fun Saver. Disposable cameras are fairly simple devices, but there are still a few important things worth knowing before you hand them out. That’s especially true at a wedding, where lots of different people will be using them, and the best moments often pass by in seconds - it would be a shame to miss a great shot simply because someone wasn’t sure how the camera worked. Feel free to forward this article to your loved ones if you’re planning to use disposable cameras at your wedding, so they can get familiar with the idea beforehand and capture some wonderful keepsakes on the day. We’ve also put together a printable disposable camera instruction sheet in PDF that you can print for free and pop in a frame next to the cameras at your reception.
What to check before buying a camera
There are countless disposable camera models available online, and they can differ quite a bit from one another. Here are the key specs, from our experience, that are worth checking before you buy:
Number of shots - how many photos you get depends on the film loaded in the camera. Most commonly it’s either 27 or 39 shots per camera. It’s worth seeking out the 39-shot versions, since they’re often only slightly pricier while giving you 12 extra photos. That also means you can get away with buying fewer cameras overall while still ending up with a similar total photo count from the wedding.
Film speed (ISO) - the film inside the camera plays the biggest role in how your photos turn out. Film speed measures how sensitive the film is to light. Put simply, the higher the ISO, the brighter your photos will come out, assuming everything else - like the lighting - stays the same. In our experience, this is the single most important spec for a wedding, since most of your shots will be taken indoors, in a dimly lit venue. We’d recommend going with ISO 800 film for that reason. If you’re planning to shoot outdoors on a bright summer day, ISO 400 will work just fine too. Indoors, lean on the flash - it’ll properly expose your photos even when the room is too dark on its own.
Built-in flash - most disposable cameras have one, but it’s worth double-checking. Without a flash, photos taken in a dim reception hall will likely come out black, with little to nothing visible in them.
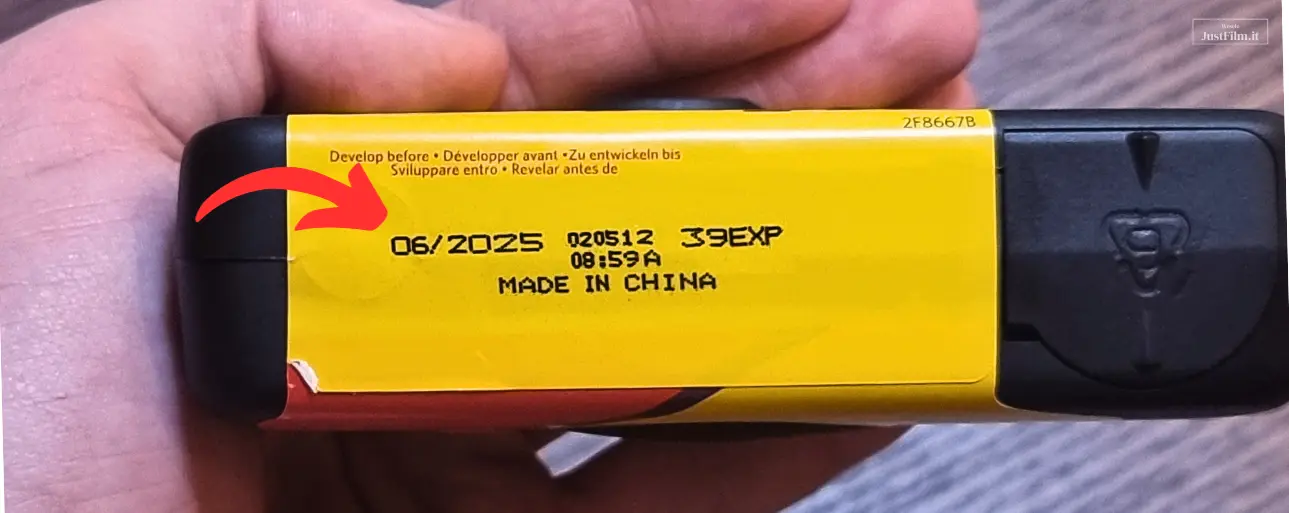
Film expiration date - before you buy, check the expiration date of the film loaded in the camera; it should be listed in the product description. Analog film does have a shelf life, and shooting past that date won’t necessarily ruin your photos outright, but it can affect quality - think lower contrast or shifted colors. Make sure the expiration date falls safely after your wedding.
How to take photos during the wedding
Before every shot, start by winding the camera using the dial shown in the photo below. Keep turning it until it stops and won’t turn any further. Our tip: tell your loved ones to wind the camera right AFTER taking each photo - that way it’s always ready for the next shot, and nobody misses an important moment.
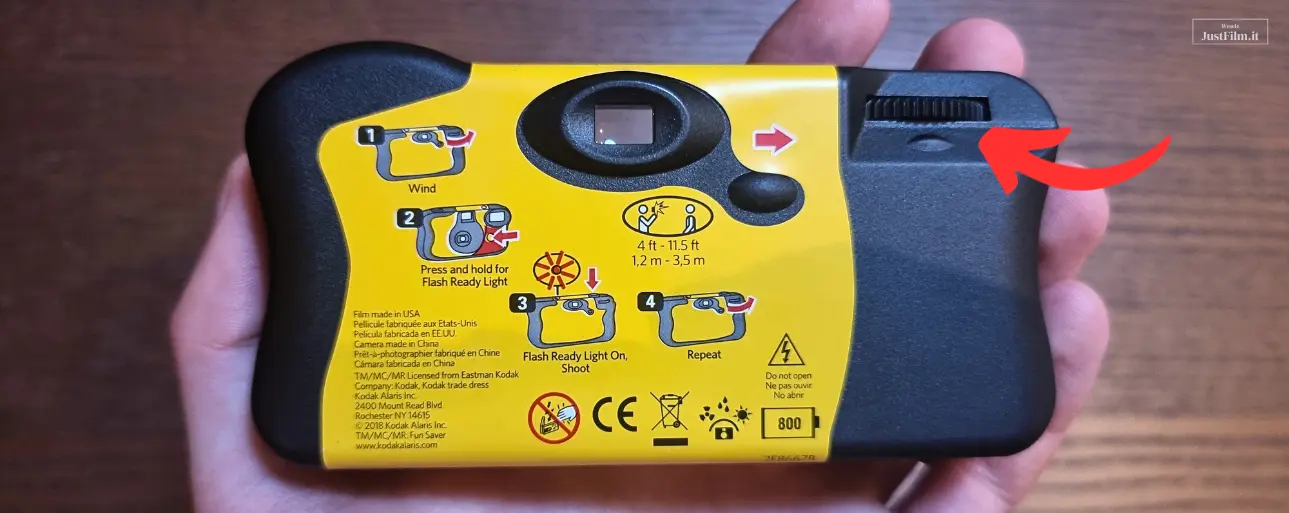
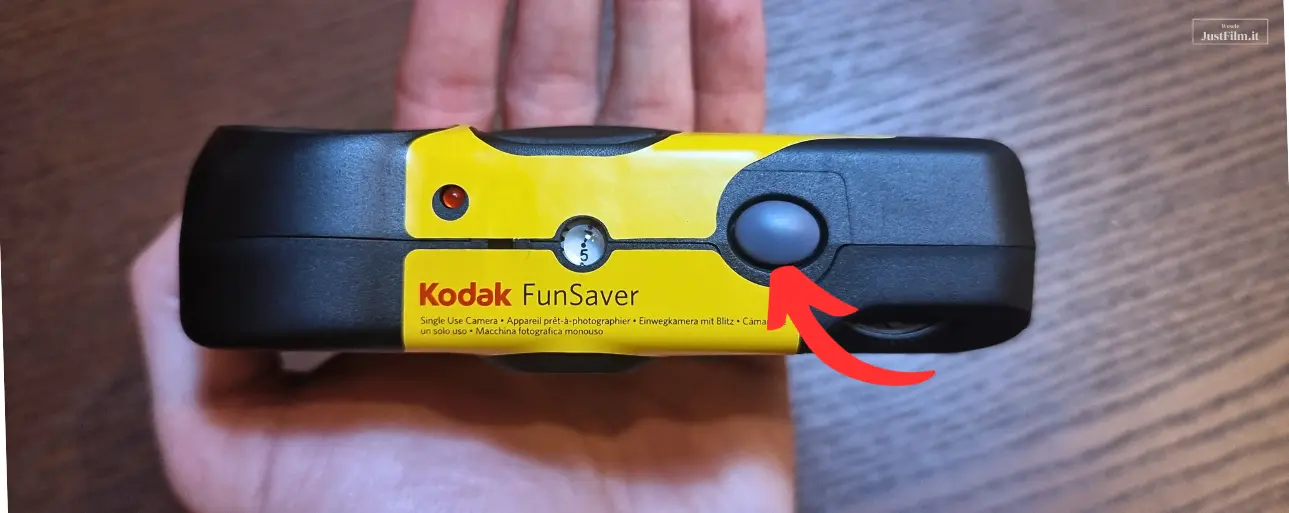
Once the camera is wound, simply frame your shot, make sure you’re not covering the lens, and press the shutter button. Here’s an important detail to keep in mind: the viewfinder you look through isn’t actually connected to the lens itself. That means if your finger is covering the lens, you won’t be able to tell just by looking through the viewfinder - so it’s worth double-checking every time that your fingers are clear of it. Disposable cameras are genuinely tiny, and it’s surprisingly easy to accidentally block the lens with a finger, which will ruin the shot. It’s also worth remembering that disposable cameras have no autofocus, so you need to be mindful of distance to avoid blurry photos. Every camera lists the distance range the subject needs to be within - in our case, that was 1.2 to 3.5 meters. That’s a fairly significant limitation to keep in mind while shooting: for example, a close-up of the wedding rings will come out blurry, because the subject will be too close to the lens.
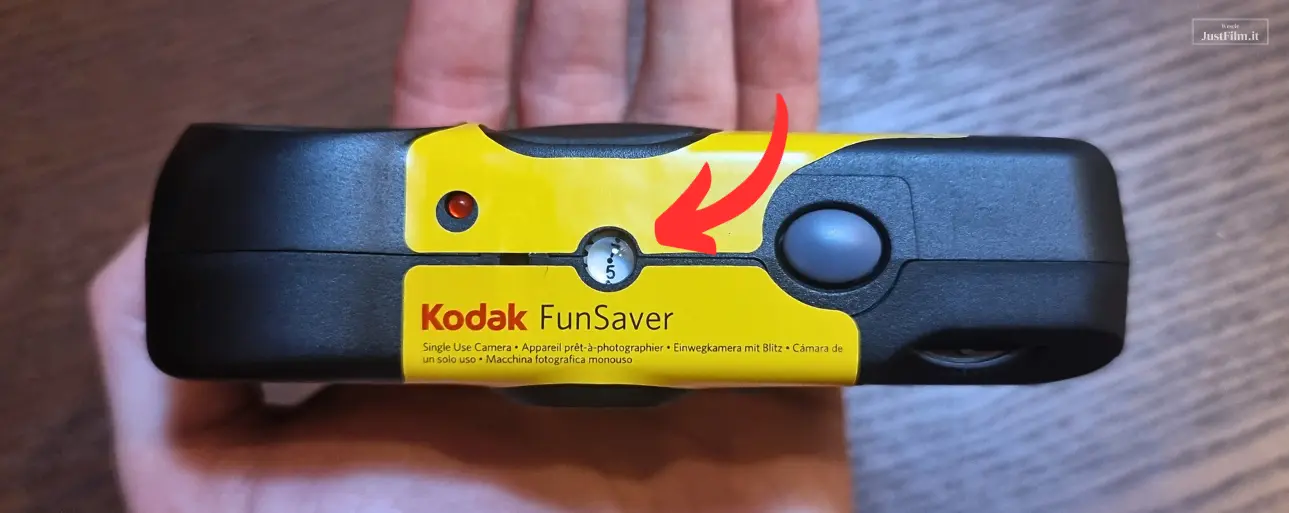
After taking a photo, we recommend winding the camera right away so it’s immediately ready to go. You can check the frame counter at any time - the little window shows how many shots are left before the film runs out. Once the counter hits zero, no more photos can be taken, and the camera needs to go to a photo lab to have the film developed.
Using the flash
If you’re taking a lot of photos at a wedding, you’ll want to use the flash. Disposable cameras tend to be fairly dim by nature, so if you’re shooting in a reception hall without especially bright lighting, you’ll likely need the flash for nearly every photo. The important thing to know is that the camera doesn’t fire the flash automatically for every shot (at least not on our model) - it’s up to you to decide when to use it and to charge it before each photo. To take a photo with flash, press and hold the button on the front of the camera.
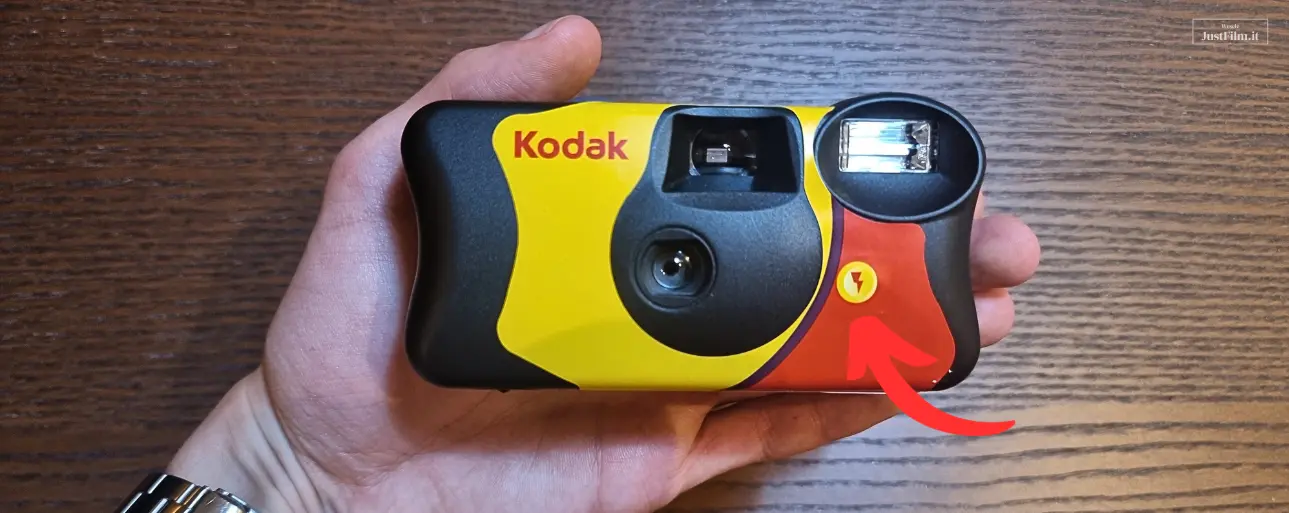
Hold the button down for a few seconds while watching the red LED on top of the camera - it shows you the flash’s charge level. Keep holding the button until the LED reaches full brightness and stops getting any brighter. Once you let go, the LED will turn off - that’s completely normal, so don’t worry. It can feel a little counterintuitive, since it might seem like the flash has lost its charge, but it’s simply designed to only display its status while the button is held down.
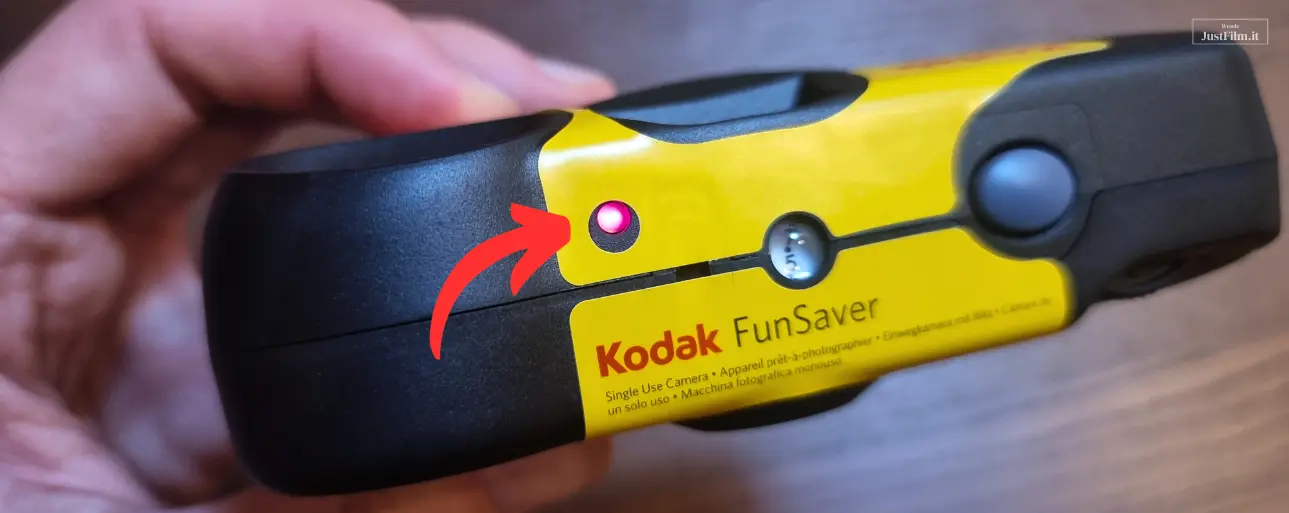
So when should you use the flash? In most cases, if you’re shooting inside a reception hall without particularly strong lighting, we recommend keeping the flash on. You can skip charging it when shooting outdoors on a bright, sunny day. When shooting with the flash on, watch out for mirrors and glass - if either ends up in the frame, the flash’s reflection will wash out a good chunk of the photo.
Najczęściej zadawane pytania
How do you take a good photo with a disposable camera?
How do you develop photos from a disposable camera?
How many photos can you take with a disposable camera?
When should you use the flash on a disposable camera?
Why do photos from disposable cameras come out blurry?
What's a good alternative to disposable cameras at a wedding?
Disposable cameras are great! But we also have a pretty cool app
Instead of disposable cameras, you could use our JustFilm.it app, which collects unforgettable photos and videos straight from every guest’s phone! Here’s what makes our app worth considering:
- Alongside photos, you’ll also collect video clips.
- No limit on the number of photos or videos - you’re not capped at a fixed number of frames like with a camera.
- It’s much easier to get a great shot with a phone camera.
- No waiting around for development - every photo lands in your online gallery instantly.
- The app will also edit a unique wedding highlight video from everything collected.
- Still love that analog feel? We can print any photos you choose.
Blog readers get a special discount on our app! Send us a message on social media or at [email protected] with your wedding date and the code BLOG10, and we’ll check whether that date is still available - if it is, you’ll be able to get access at a discount.